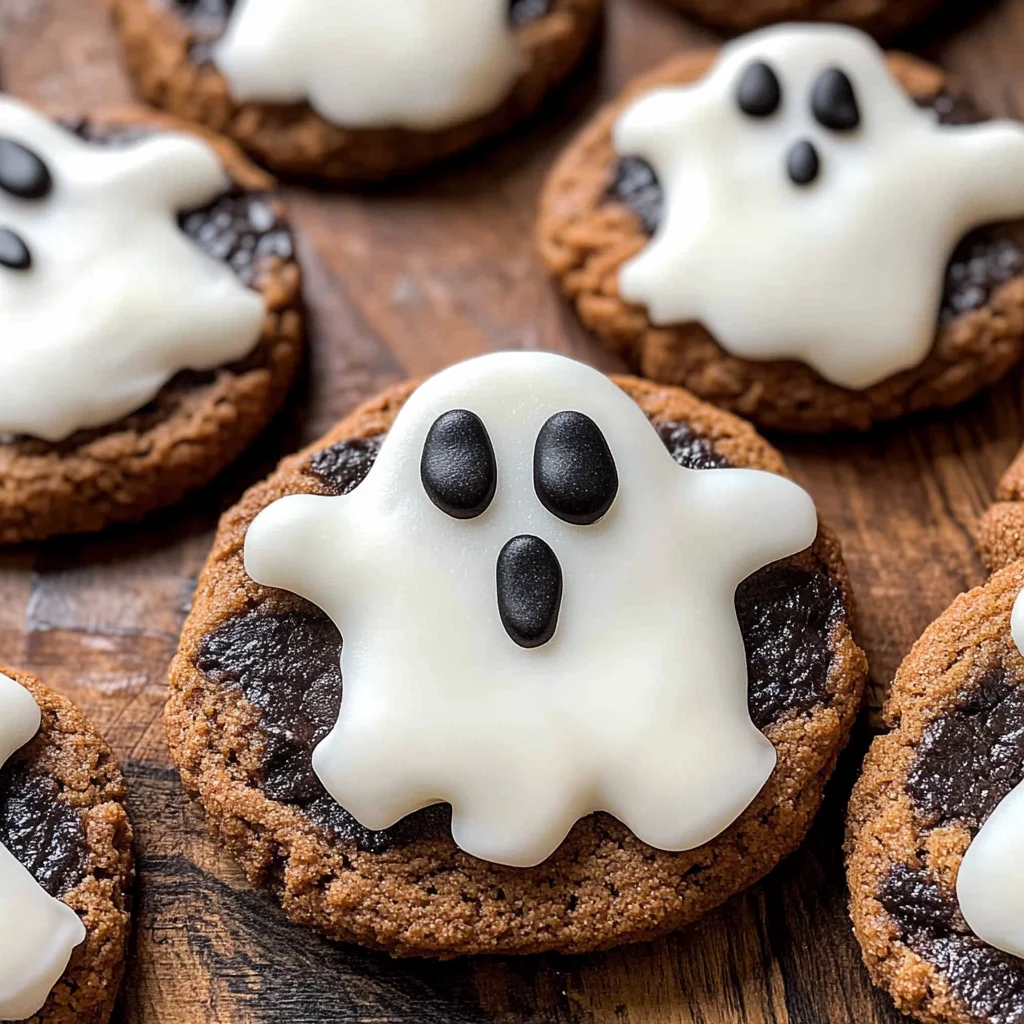
Ghost cookies
Ghost cookies are the perfect spooky treat for Halloween! These delightful cookies are not only fun to make but also easy to customize, making them a hit at any gathering. With their playful ghostly appearance, they are sure to impress kids and adults alike. Whether you’re hosting a Halloween party or just looking for a fun baking activity, these ghost cookies will add a festive touch to your celebrations.
Why You’ll Love This Recipe
- Quick and Easy: With just 25 minutes of prep time, you can whip up these ghost cookies in no time.
- Creative Fun: Decorating the cookies allows for creativity, making it a great activity for kids and families.
- Spooky Appeal: The ghostly design makes these treats perfect for Halloween festivities and gatherings.
- Minimal Ingredients: Using just a few simple ingredients means less hassle while still delivering delicious results.
Tools and Preparation
To make these ghost cookies, you’ll need some essential tools to ensure everything goes smoothly.
Essential Tools and Equipment
- Mixing bowl
- Baking sheet
- Parchment paper
- Spoon or spatula
Importance of Each Tool
- Mixing bowl: A good mixing bowl is essential for combining your icing sugar and cookie ingredients efficiently.
- Baking sheet: The right baking sheet ensures even heat distribution while baking, preventing unevenly baked cookies.
- Parchment paper: Using parchment paper helps prevent sticking and makes cleanup much easier.
Ingredients
For the Ghost Cookies
- 175g icing sugar
- 1 x 200g pack chocolate chunk cookies
- 9 marshmallows (regular size)
- black writing icing
How to Make Ghost Cookies
Step 1: Prepare the Cookies
Start by laying out your chocolate chunk cookies on a baking sheet lined with parchment paper. This will be the base for your ghost treats.
Step 2: Make the Icing
In a mixing bowl, combine the icing sugar with a little water until you achieve a smooth consistency. This will be used to attach the marshmallows to the cookies.
Step 3: Assemble the Ghosts
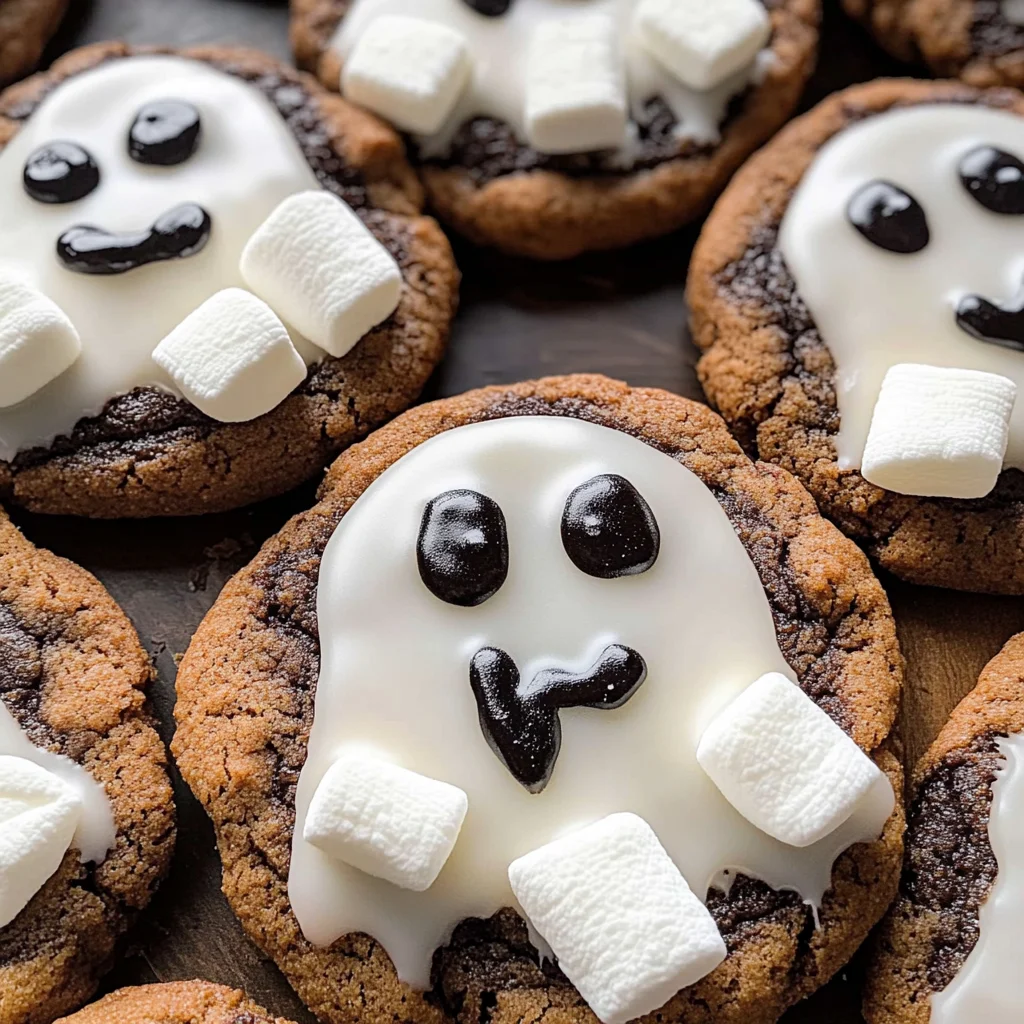
- Take one marshmallow at a time and dip it in the icing mixture.
- Place the coated marshmallow on top of each cookie.
Step 4: Decorate Your Ghosts
Using black writing icing, draw eyes and mouths on each marshmallow to create spooky faces. Be as creative as you like!
Enjoy your festive ghost cookies at your next Halloween party or as a fun treat for family and friends!
How to Serve Ghost cookies
Ghost cookies are a fun and festive treat perfect for Halloween parties or gatherings. These spooky delights can be served in various ways to enhance the holiday spirit.
Creative Platter Ideas
- Ghostly Dessert Table: Arrange ghost cookies on a themed dessert table with other Halloween treats like pumpkin cupcakes and spider web brownies.
- Individual Treat Bags: Place each ghost cookie in clear treat bags tied with orange or black ribbons for a cute party favor.
- Spooky Snack Station: Set up a snack station where guests can decorate their own ghost cookies with extra icing and sprinkles.
Fun Presentation Styles
- Haunted House Display: Use a small cake stand resembling a haunted house to present the ghost cookies dramatically.
- Themed Plates: Serve the cookies on Halloween-themed plates to enhance the visual appeal.
- Cookie Tower: Stack the ghost cookies into a tower for an eye-catching centerpiece that’s sure to impress your guests.
How to Perfect Ghost cookies
To create the ultimate ghost cookies, follow these essential tips that will elevate your baking game.
- Choose Quality Cookies: Opt for high-quality chocolate chunk cookies as your base to ensure great flavor and texture.
- Use Fresh Ingredients: Make sure your icing sugar and marshmallows are fresh for the best results; stale ingredients can affect taste and presentation.
- Melt Marshmallows Carefully: When melting marshmallows, do it slowly to avoid burning and achieve the right consistency for decorating.
- Practice Icing Techniques: Experiment with different piping techniques using black writing icing to create unique ghost expressions.
- Let Cookies Cool Completely: Ensure your cookies are completely cool before decorating; this prevents the icing from melting or sliding off.
Best Side Dishes for Ghost cookies
Serving ghost cookies alongside complementary side dishes can elevate your Halloween festivities. Here are some great options:
- Pumpkin Soup: A warm, creamy pumpkin soup is perfect for fall and pairs well with sweet treats.
- Witches’ Brew Punch: This fun, colorful punch can be made with fruit juices and soda, providing a refreshing drink option.
- Spider Deviled Eggs: Add a spooky twist to classic deviled eggs by using olives to create spider shapes on top.
- Mummy Hot Dogs: Wrap hot dogs in crescent dough strips, bake them until golden, and add little mustard eyes for a fun savory snack.
- Caramel Apple Slices: Slice apples and dip them in caramel for a sweet side that balances out the richness of ghost cookies.
- Cheese and Cracker Platter: Provide a simple cheese platter with various crackers; it’s easy to prepare and complements sweet flavors well.
Common Mistakes to Avoid
Making ghost cookies can be a fun and delightful experience, but it’s easy to make mistakes. Here are some common pitfalls to watch out for.
- Ignoring the Timing: Not sticking to the prep time may lead to rushed decorating. Take your time to ensure each cookie looks perfect.
- Overdoing the Icing: Too much icing can make cookies overly sweet. Use just enough to create a ghostly appearance without overpowering the flavor.
- Wrong Cookie Selection: Using cookies that are too soft may make decorating difficult. Choose sturdy chocolate chunk cookies for best results.
- Neglecting Storage: Not storing ghost cookies properly can cause them to dry out. Use airtight containers to keep them fresh for longer.
- Forgetting about Allergies: Be mindful of guests’ allergies when serving ghost cookies. Check ingredient labels and consider alternatives for sensitive eaters.
Storage & Reheating Instructions
Refrigerator Storage
- Store ghost cookies in an airtight container for up to 5 days in the fridge.
- Keep layers separated with parchment paper to prevent sticking.
Freezing Ghost cookies
- Freeze ghost cookies in a single layer for up to 3 months.
- Use freezer bags or containers, removing as much air as possible.
Reheating Ghost cookies
- Oven: Preheat to 350°F (175°C) and warm cookies for about 5 minutes. This keeps them nice and soft.
- Microwave: Heat one cookie at a time on high for about 10 seconds. This is quick but be careful not to overdo it.
- Stovetop: Place a cookie in a skillet over low heat for about 30 seconds. This method helps retain moisture.
Frequently Asked Questions
If you have questions about making ghost cookies, we’ve got answers!
What are Ghost cookies?
Ghost cookies are spooky treats made from chocolate chunk cookies decorated with icing and marshmallows, perfect for Halloween festivities.
Can I customize my Ghost cookies?
Absolutely! You can add different toppings like sprinkles or use various colors of icing to create unique designs.
How long do Ghost cookies last?
When stored correctly, ghost cookies can last up to 5 days in the fridge or up to 3 months in the freezer.
Are Ghost cookies suitable for kids?
Yes! These fun and creative treats are great for kids and can be a fun baking activity together.
Can I make these Ghost cookies vegan?
Yes! Substitute regular chocolate chunk cookies with vegan-friendly options and use plant-based icing sugar if needed.
Final Thoughts
Ghost cookies are not only adorable but also versatile. They bring joy during Halloween celebrations and can easily be customized based on your preferences. Try this easy recipe today and create your own spooky treats that everyone will love!
Ghost Cookies

Ghost cookies are the ultimate Halloween treat that bring festive fun to any celebration! With their playful marshmallow tops and spooky designs, these cookies are a delightful way to get creative in the kitchen. Perfect for kids and adults alike, ghost cookies can be customized with various decorations, making them an ideal activity for Halloween parties. In just 25 minutes, you can whip up these charming snacks that are sure to impress your guests. Whether you’re hosting a gathering or simply looking for a fun baking project, these ghost cookies will add a whimsical touch to your festivities.
- Prep Time: 10 minutes
- Cook Time: None
- Total Time: 0 hours
- Yield: Makes about 9 ghost cookies 1x
- Category: Dessert
- Method: Baking
- Cuisine: American
Ingredients
- 175g icing sugar
- 1 pack (200g) chocolate chunk cookies
- 9 regular-sized marshmallows
- black writing icing
Instructions
- Prepare your workspace by lining a baking sheet with parchment paper.
- Lay out the chocolate chunk cookies as the base for your ghost treats.
- In a mixing bowl, combine icing sugar with a small amount of water until smooth.
- Dip each marshmallow in the icing mixture and place it on top of each cookie.
- Use black writing icing to create eyes and mouths on the marshmallows for fun spooky faces.
Nutrition
- Serving Size: 1 cookie (30g)
- Calories: 130
- Sugar: 11g
- Sodium: 50mg
- Fat: 5g
- Saturated Fat: 2g
- Unsaturated Fat: 3g
- Trans Fat: 0g
- Carbohydrates: 20g
- Fiber: 0g
- Protein: 1g
- Cholesterol: 0mg